I've received several questions about spline construction, so I thought it would be
good to post some information about the process. I learned about it in a magazine article
in Railmodel Journal, and have noted this reference and others at the bottom of
this page.
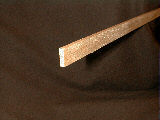 A spline is
a thin vertical piece of wood, typically 8 to 12 feet long. I make splines using 1x6
poplar or pine; poplar is the better choice after having used both. On a table saw, I rip
the splines about 5/16 inches wide until the board is too thin to safely continue. Then,
each spline is run through a thickness planer, first one side then the other, until it is
precisely 3/16 inch thick. This example shows construction of an HO-scale spline
sub-roadbed. An N-scale modeler would omit the spacers and use 4 splines alone.
Larger scale modelers can use more splines or spacers as they see fit.
A spline is
a thin vertical piece of wood, typically 8 to 12 feet long. I make splines using 1x6
poplar or pine; poplar is the better choice after having used both. On a table saw, I rip
the splines about 5/16 inches wide until the board is too thin to safely continue. Then,
each spline is run through a thickness planer, first one side then the other, until it is
precisely 3/16 inch thick. This example shows construction of an HO-scale spline
sub-roadbed. An N-scale modeler would omit the spacers and use 4 splines alone.
Larger scale modelers can use more splines or spacers as they see fit.
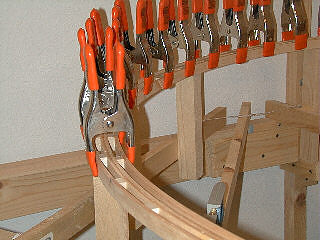
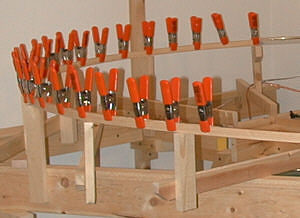 The first step in building is locating one spline along one side of the centerline. As
suggested in the article, I drill a tiny hole through the spline vertically and use a brad
to hold it in place on the riser. Next, a second spline is glued to the first spline as
shown above. Hand clamps placed frequently along the double spline ensure good contact
while drying. (We affectionately refer to this as the Splinosaurus.)
The first step in building is locating one spline along one side of the centerline. As
suggested in the article, I drill a tiny hole through the spline vertically and use a brad
to hold it in place on the riser. Next, a second spline is glued to the first spline as
shown above. Hand clamps placed frequently along the double spline ensure good contact
while drying. (We affectionately refer to this as the Splinosaurus.)
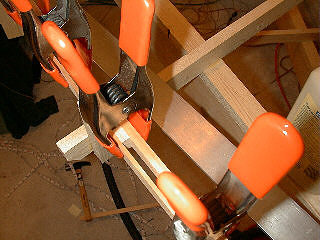
Be sure to use a good yellow wood glue and lots of clamps. One friend told me an
unfortunate story of how he had built a nice spline-based layout in his attic. One
hot summer afternoon he walked
into his train room to see the hot glue had loosened because of the heat - and the splines
popped around all the corners!
 After the two centerline splines dry, the first outside spline is added. Every few
inches a spacer is inserted to maintain the distance between the side and center splines.
These spacers are made the same way as the splines. They are exactly 3/8" thick,
again from using the thickness planer. This is especially important if you want to
double-track using splines and spacers.
After the two centerline splines dry, the first outside spline is added. Every few
inches a spacer is inserted to maintain the distance between the side and center splines.
These spacers are made the same way as the splines. They are exactly 3/8" thick,
again from using the thickness planer. This is especially important if you want to
double-track using splines and spacers.
 The other side's spline is added as the final component.
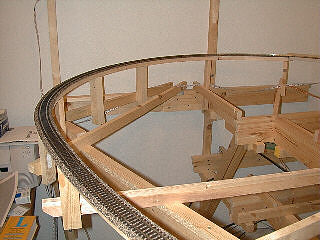
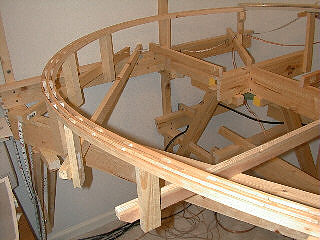 The resulting sub-roadbed is very, very strong. It has graceful, flowing lines
consistent with using easements in the design.
The resulting sub-roadbed is very, very strong. It has graceful, flowing lines
consistent with using easements in the design.
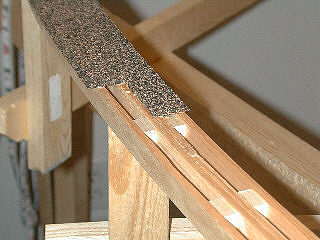 Cork is glued directly to the spline sub-roadbed. You might want to experiment with
different glues, as this is the point where vibrations from the locomotive motor will be
transmitted to the wood. Wood glue, Pliobond and Goo all have different sounds.
Cork is glued directly to the spline sub-roadbed. You might want to experiment with
different glues, as this is the point where vibrations from the locomotive motor will be
transmitted to the wood. Wood glue, Pliobond and Goo all have different sounds.
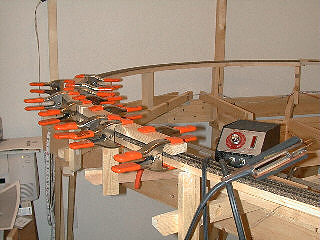 Track is then glued to the cork roadbed. A resistance soldering tool ensures good
electrical connection between pieces of flex track. Clamps and scraps of 1x2 hold the
track firmly as the Goo dries (Splinosaurus horizontalis).
Track is then glued to the cork roadbed. A resistance soldering tool ensures good
electrical connection between pieces of flex track. Clamps and scraps of 1x2 hold the
track firmly as the Goo dries (Splinosaurus horizontalis).
 The completed roadbed and track, ready for wiring and running.
See also
Spline Benchwork Construction
Railmodel Journal, January 1998 page 15
Roadbed for Cold Climates
Garden Railways, November/December 1992 page 24
Splined subbase provides an inexpensive solution
Switch machine installation for spline roadbed
Railroad Model Craftsman, March 1982 page 82
Laminated Spline Roadbed Tips
NMRA Bulletin, April 1979 page 65
Thanks to Marty Marchyshyn for these references!